
Please remember to remove this template once the image(s) have been added.
These are the glitches which are possible to perform in Link's Awakening. Please read the Glitch Disclaimer Notes before attempting any of the glitches on this page.
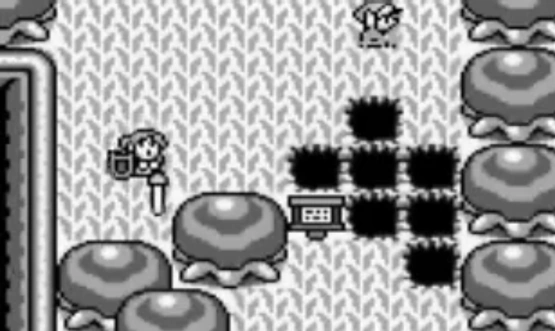
Screen Warp Glitch
Risk: Highly variable, depending what you do with it. You could be stuck in a wall and have to reset your game system. You can also be caught in loops where you continuously respawn over deep water or a pit. In very rare and unusual cases, you can potentially corrupt your saved games.
In the first room of the Moblin Cave, going 2 screens south (but not stepping out the exit door to the overworld), then west and finally north will cause the game to crash.
How to Perform:
- Go to the very edge of a screen that you can walk to another screen from.
- Move towards the edge of the screen and just before it begins to scroll press "Select".
- Press "Select" again to get rid of the map and you should now be on the new screen but in the same place you were on the old one.
Note that the sprites will follow or slide across the screen when the screen fades to the map depending on the timing. If possible, try to scout out the destination screen to ensure you don't warp yourself into a tree or other obstacle. In some cases, when stuck inside a wall, it is possible to either push onto the next screen (if Link is still touching the edge of the screen) or to jump off onto the floor (if any floor exists). It is also possible to warp onto the upper inaccessible ledges in caves. By doing so and walking off the screen in an unintended direction, you can potentially end up in other caves in far away areas. For example, by screen-warping inside the Mysterious Wood's cave, one can potentially end up in the cave systems of areas such as Tal Tal Heights. This works because every cave or room is adjacent to one another on a second map distinct from the overworld. By screen warping many times trough the various dungeons and past the obstacles it is actually possible to visit every single panel of the game without even getting the sword, thus making possible to collect all Instruments of the Sirens from the beginning.
Dangers: Screen-warping is generally safe, but there are several dangerous situations to avoid. Don't attempt to warp through the Nightmare doors. The game crashes spectacularly and fades to white while having the text box stating that the door is locked. Upon rebooting the system, your save files are usually all gone! If you end up inside the cave where the Magnifying Glass is located or in Eagle's Tower, don't exit out to the overworld unless you have already freed the entrance. If you DO exit, and become stuck inside the statue or the wall, do NOT save and exit in an attempt to free yourself. If you do, that file will be stuck in that spot forever.
Versions: This glitch will only work in earlier versions of the original Link’s Awakening, and very, very few select copies of the DX version. [citation needed]
Marin Forever
Risk: Minor, but may mess game progress up.
How to Perform:
- Complete the third dungeon, the Key Cavern.
- Go to Animal Town and Screenwarp past the sleeping walrus.
- Get the key in the desert area.
- Screenwarp back past the walrus.
- Go and get Marin.
Marin will now follow you forever. Later on in the game when you normally see Marin up in the mountains, you won't. If you go swimming - she will walk on water behind you. After you beat level 4 and the ghost starts following you, Marin's sprite will look like a ghost too. To turn her normal again, get rid of the ghost, then take her back to her house. To get rid of Marin, take her and wake up the Walrus.
Level-0 Shield
Risk: Inevitable (Once you get to Eagle's Tower and supposedly get the Mirror Shield, you only get the Level-1 Shield, thus making further progress in the game impossible.)
How to Perform:
- Before you take the Sword from Toronbo Shores, screenwarp to another screen. (From where the sword should be)
- Take the sword from the screen you went to.
- Go to where the sword originally was, there should be a Shield there instead. Screenwarp again.
(optional) #Take the Shield.
Works just like a Shield but is completely invisible and does not slow you down when in use. Unless you did step 4, if you fall victim to a Like Like you lose the shield permanently.
Marin/Enemy Sprite Switch
The effect of the glitch
Risk: None
How to Perform:
- Travel to Mabe Village, specifically in front of Tarin and Marin's house.
- Screenwarp to the right and walk through the trees.
- Go down a final screen.
Marin will appear, except she will have both a sword and shield. She will attack you, and you can harm her if you like. She is fairly easy to defeat and often drops life energy upon defeat. Similar glitches can also create a Grandma Ulrira with a bow, a sword and shield, or the abilities of an Octorok that shoots people rather than its standard projectiles. This happens because the game didn't load the graphic for sprites correctly, certain areas update the graphic so the sprite appears normally. But when Link screen warps, this skips the loading graphics and the sprites appear to be the same as the previous area, causing sprites to share graphics with another in the next screen.
Money Bug
Risk: None
Effect: Save extra Rupees and don't pay "full price", without stealing.
How to Perform:
- Go to the shop.
- Pick any item. The more expensive - the better and easier to perform.
- Take it to the counter and buy it.
- As soon as the game starts to subtract your Rupees, press Start + Select + A + B and choose Save & Quit. Reload your game.
You'll have the item, and you'll have Rupees depending on how fast you were (based on the money that wasn't deducted). This happens because when you save and quit while the Rupee counter is subtracting, it will stop the Rupee counter from counting down, saving your Rupees. The only danger is that if you re-enter the same shop after using this bug, the shopkeeper will recognize you as a thief and zap you with magic that kills you instantly.
Stuck
Risk: High
How to Perform:
- Once you have used up 3 keys in the Angler's Tunnel, go to the room 5C.
- Jump up, north, over the water towards the switch. The jump looks impossible to manage, but you can do it. Once you make the jump, go north and unlock the block. This puts you in a Catch-22 situation - you cannot get the fifth key without the flippers and you can't get the flippers without the fifth key. The only way to get out of this is by screen warping.
This is impossible in the DX version, due to an added tile of water.
Mountain Hut
Risk: None
How to Perform:
- Start a new game.
- Get the shield back from Tarin. Don't leave the house, though.
- Go to the map. It will say that you're somewhere in the mountains, at the top-left corner of the map. Once you leave the house, this will fix itself again.
This is fixed in the DX version.
Corruption
Risk: Very dangerous
How to Perform:
- Go to the main menu to delete a save game. (Preferably one where you have done everything.)
- Select a file and the instant you click OK to delete it, turn the Game Boy off.
- Turn you game back on and see if the save file is still there. If it is, see if anything has changed.
This is because of the way the Game Boy handles the data.
By turning off the Game Boy, it stops the deletion of the file. First goes the map, then dungeons and caves, then hearts, chests and Rupees, and finally items and the file.
Not as much of a glitch as corruption. It is also possible to perform this glitch by removing the cartridge completely after clicking OK.
Glitch Dungeon
Risk: Depends on what you do with it.
How to Perform:
- Go into the room that Moldorm was in in Tail Cave.
- Fall down a hole in that room.
- Use the Roc's Feather to jump while falling. (You have to jump off the screen)
This glitch will bring you to a glitchy version of most of the dungeons. You can walk almost anywhere but invisible barriers or squares of water appear due to the tiles and blocks behaving abnormally. Going up (or down) stairs will end the glitch, all unopened chests contain a Power Bracelet or its upgrade, and you come out where the stairs were. The only harm this glitch will bring is if you come up in a dungeon where the entrance is blocked then save.
This happens because staircases and the top and bottom edges of the screen (in side-scrolling areas) are considered to be "warp points" because they take Link to another area. If Link triggers any of these points in screens or rooms that don't have a destination, the objects won't load correctly after Link has been transported. It also happens if Link screenwarps past the walls in side-scrolling rooms into an empty room (unused rooms) and hits the bottom of the screen (the area within a screen isn't programmed to have a destination to another place). This is impossible in the DX version.
Glitch World
Glitch World With 1 Enemy Killed in Link's Awakening DX.
Risk: Depends on what you do with it.
How to Perform:
- Kill a number of enemies anywhere in Koholint Island.
- Go to Madam Meow Mow's House and go behind the kennel.
- Push down on the D-Pad and tap right until you go down the side of the kennel (going through the top-right corner). Because of how solid object tiles work in the game, they do not fully push Link out of them when going into corners, unlike A Link to the Past.
- You should now be clipped into the kennel roof tile more than usual, press Left to enter the kennel from the back.
- You should arrive in a glitch world, press Up and Left to start looking around. The tiles and blocks behave differently depending on the number of enemies killed. A certain numbers of enemies killed causes Link to be in a glitch world and then immediately back in the overworld, or repeatedly falling down the hole due to the tiles. Tiles will behave normally if you killed exactly 1 enemy.
The glitch world you enter depends on how many enemies you have killed beforehand. Killing 0 will result in Link spawning in Goponga Swamp in the DX Version and Yarna Desert in the black and white version.
Do not enter mini-boss rooms while in the glitch world, the sound of the portal appearing will play and the inventory menu (the pause menu) will open in a glitch state, pressing the START button to close the glitched menu will result in the menu rising up and disappearing repeatedly and get stuck in an endless loop, forcing the player to reset.
Note: If Link triggers an event that would reset the music (by grabbing items that would bring up a text box, such as a Golden Leaf or from opening a Chest), while there is no music (by avoiding the Great Fairy room, grabbing the Guardian Acorn or the Piece of Power), the game will attempt to play an invalid music.[1]
Obtaining Colored Tunics Without Visiting the Color Dungeon (Including Extra "Damage Sprite Tunic")
Risk: None
How to Perform:
- Kill 89 on-screen enemies without leaving the overworld.
- Kill a 90th enemy or enemies. Depending on the index of the enemy/enemies the player kills, the tunic will change to be one of four types, listed below.
Index 00 - The green tunic
Index 01 - The red tunic
Index 02 - The blue tunic
Index 03 - The damage sprite tunic
The damage sprite tunic doubles the damage of Link's sword attacks, but does not send enemies flying like the red tunic does. All tunics are permanent (including the damage sprite tunic), and can only be changed by visiting/revisiting the Color Dungeon, or by preforming the glitch again but ending with a different enemy index on the 90th kill. The glitch can be done as soon as the player acquires the sword.
If an enemy with an index of larger than 03 is killed as the 90th kill, the palettes for overworld sprites will begin to be overwritten.
Link Stabs Himself
Risk: None
This glitch can only be performed on an emulator, because it requires pressing the D-Pad in opposite directions (impossible on hardware).
How to Perform:
- Press Up/Down or Left/Right to walk in place, then charge Link's sword. Link will appear to "stab himself" with the sword, and can move around in this position as if floating.
Link's sprites vary greatly during this, but never seem to cause any lasting graphical glitches after stopping. This glitch can kill enemies from some distance away with the sword, however, meaning that it could in theory be used for sequence-breaking (eg. by hitting a switch through a barrier). Video example here. A another glitch branching off of this, originally known as the Unknown Cane, was used by holding down all D-Pad buttons, charging a spin attack and rapidly pressing the button to create a strange series of corrupted sword beams that do increased damage.
Link Trapped in a Ball
Risk: A varying amount of time wasted, depending on restarting or waiting to die.
How to Perform:
- During Eagle's Tower, pick up the metal ball and screw around with the D-Pad. You may suddenly get stuck inside of the ball and Link's sprite disperses, leaving only the ball in his place. All buttons will be disabled and enemies can still harm you by touching the ball. The only way to undo this is to wait until you die, fall into a pit or restart your game.
Use the Pegasus Boots in Place
Risk: None
How to Perform:
- Link must go into a cave containing a Great Fairy.
- Equip the Pegasus Boots and charge up to the Great Fairy.
- Her healing cut-scene will interrupt Link, but after the cut-scene, Link will be charging in the same spot. Press A or B to deactivate this glitch. This can also happen with everything that cancels Link's dash, such as using the shovel, the Armos Knight's tremor, or running into Buzz Blobs.
Vertical Cross Glitches
The following is a list of effects for each action Link can do while performing the Vertical Cross (VC). The VC occurs when both Up and Down are pressed at the same time. The glitches all have different effects on Link and his surroundings, but none are truly dangerous. Most actions will require Link to be charging a Spin Attack while performing them. The effects of the glitches also change depending if Link is in the Normal, Top-Down view, the tunnel side-scrolling view and the underwater side-scrolling view. An ideal place to test out the various effects is Level 5, Catfish's Maw.
Out of Water, Top Down (Normal View)
Note: Random sprites will occur on Link and around the screen while performing these techniques, but they have no effect.
- Sword Slash:The sword will only strike objects one square to the top right of you
- Spin Attack Charge: You will see the 'Link Stabs Himself Glitch' occur, and you can touch enemies to hurt them, but only in certain spots
- Spin Attack Released: The Spin Attack has the same effect, but it will also hit. You also will appear to do damage in a square 3 below and 5 squares to the left of Link.
- Shield:If you hold the Spin Attack charge and contact enemies they'll take damage. If the Shield button is pressed while charging, you can immediately hit any enemy that is up to 9 squares above or below Link
- Mushroom: Nothing
- Magic Powder:
- Roc's Feather: Nothing
- Deluxe Shovel: Link's sprite will be ripped in half and you'll only see the right portion. You will also have the same effect as the Sword Slash, except you will still dig a hole, but it will be 4 squares above and 3 squares left of your position.
- Bombs:
- Bow:
- Power Bracelet: Nothing
- Pegasus Boots: Link will soar with extreme speed towards the top-right corner. If Marin is following Link as he soars and crashes into a wall or object, her sprite will turn into a strange creature.
- Ocarina:
- Hookshot: The chain appears 2 squares below and flies to the approximate top-left. This can actually help you get on top of ledges and such.
- Magic Rod:
- Boomerang:
Magic Rod Lag/Spawn Detection Glitch
Risk: None
Effect: Causes the Magic Rod's projectile to lag the game.
Prerequisites: Magic Rod
How to Perform:
- After obtaining the Magic Rod from Turtle Rock, the player must press the button the Magic Rod is assigned to (A or B) and the START button at exactly the same time (easy if not pressing START first; sometimes the rod, then the start button one frame after.), the sound effect of the Magic Rod makes will "extend" as the inventory screen rises up and the game will lag.
This happens because the inventory screen briefly freezes the animation during the "release" of the projectile from the rod, when this happens, the magic rod repeatedly spawns the projectile rapidly as the menu rises up. With multiple projectiles on-screen, the game lags due to processing many sprites on screen.
Notes: If the player goes to the next screen while the lag is happening (when the projectile is still onscreen), sprites on the next area that Link is going to will fail to spawn due to the max number of sprites on screen. By exploiting this, puzzles that use sprites can be skipped and Link can "cheat" the puzzle. Note that the projectile will disappear entirely (not leave behind a flame) if it hits a Hardhat Beetle, Stalfos, Spark, or any enemies that "absorb" the projectile, and the game will stop lagging immediately.
Skip the Game Over Cutscene
- Risk: None
- Effect: Causes the game to skip the Game Over screen when saving.
- How to Perform:
- When Link loses all his hearts and the "Link dying" music play, press START + SELECT + A + B and in the save screen, choose "Save & Quit" immediately before the Game Over screen appears.
- In the file, the player should notice the death counter didn't count up, and upon reloading the file, Link's hearts are restored to 3 hearts. By doing that every time Link runs out of hearts, the player can see the secret ending when beating the game.
The reason why this happens is because Link can still open the save menu while dying, thus interrupting the death cutscene. The death counter only counts up when Link selects "Save & Quit" in the Game Over screen or "Continue" then "Save & Quit" after his death.
- Note: Deaths from the Town Tool Shop after stealing doesn't work because the conversation cutscene disables the buttons.
Mysterious Woods Top-right Corner (Convex) Tile Oversight
- Risk: None
- Effect: Link is able to pick up and lift top-right corner wall tiles in the Mysterious Woods as if it was a stone, leaving a solid glitch tile underneath.
- How to Perform:
- First, Link must have the Power Bracelet to lift heavy objects, then go to the Mysterious Woods.
- Any top-right corner tile behaves like a stone rather than a solid wall in the game's programming. This means that if Link uses the Power Bracelet to grab these corner tiles and try to pick it up, that tile will be "lifted" and Link will now be carrying a stone, leaving a glitched solid wall tile behind. Here is the video
Push Block Sideways
- Risk:
How to Perform:
- Because of how the solid object physics in the game were programmed, they allow Link to be partially inside the block, which the game wouldn't normally allow, by passing the corners of a block.
- By doing this on 2 pushable blocks, and pushing in between them, one of the pushable blocks will be moved sideways rather than in the direction Link pushes. This is because the game doesn't know what side of the block Link is touching to move it.
Unlock Dungeon Entrance's Keyhole in Any Angle
- Risk:
How to Perform:
- Any dungeon entrance's keyhole can be opened in any angle rather than being south of it.
- By having Link face north, charge the Spin Attack, but do not release the button, so that Link is locked into facing north, and touch any side of the keyhole block.
This happens because rather than checking on what side Link is touching the solid tile, it checks what Link is currently facing in order to trigger the keyhole. This makes it possible to enter Key Cavern on the backside of the wall by "corner-clipping" the tile above the keyhole tile.
Jump While Standing on a Hole
- Risk:
How to Perform:
- When standing on a hole tile, Link doesn't fall in until he is dragged towards the center of that tile on the tile grid. This is because the game doesn't allow Link to fall when standing on the tile boundary.
- By using the Hookshot and the Roc's Feather, the frame when the Hookshot returns to Link, Link will jump out of the hole even though he is not standing on solid ground.[2]
Map Lag
- Risk: None, besides some disorientation.
How to Perform: When entering a new screen or room and immediately checking the map, Link's position indicator on a dungeon map will not update to his current position until he moves towards the center of the screen.[3]
Power Sword
Risk: None.
How to Preform: Use the Power Bracelet to pickup any pot. Once Link has picked it up, go into your inventory and switch your Power Bracelet with your sword. Link will still be holding the pot, even though he shouldn't have the strength to. To drop the pot, just use the sword.
References
- ↑ CDiFan237's glitch music: https://www.youtube.com/watch?v=LTD3ujqpbrc&app=desktop
- ↑ A+Start's video: https://m.youtube.com/watch?v=aCMu6GqD-CI Video at 4:26
- ↑ AVGN: James & Mike Mondays https://www.youtube.com/watch?v=CgMa5qKytHk&t=1168
External Links
- Zelda Chaos, ZeldaWiki's top glitch affiliate that specializes in verifying hacks, explaining glitches, and providing up-to-date information on all things exploitable in the Zelda series.
| ||||||||||||||